


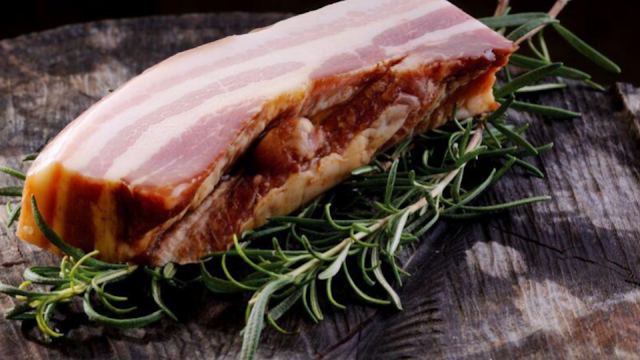
Bacon is a sort of salt-restored pork. It is set up from a few unique cuts of meat, regularly from the pork paunch or from back cuts, which have less fat than the tummy.
It is usually eaten as a side dish, or utilized as a minor fixing to flavor dishes. It is incredible in a sandwich, pasta, and pizza, and can be grilled, deep-fried, and even smoked.
Mixed peppercorns - squashed
Juniper berries - squashed
A handful of fresh laurel leaves
300 grams dry cure
25 grams demerara sugar
Oakwood
Curing process – Day 1 to Day 3
Drying Day – Day 4
Smoking Day – Day 5
Cold Smoking with Home Cured Bacon
INGREDIENTS
6 kg. fresh pork midsectionMixed peppercorns - squashed
Juniper berries - squashed
A handful of fresh laurel leaves
300 grams dry cure
25 grams demerara sugar
Oakwood
PREPARATION TIMELINE
The entire process – takes 5 daysCuring process – Day 1 to Day 3
Drying Day – Day 4
Smoking Day – Day 5
PROCEDURE
Here is a step-by-step guide on how to cure and smoke your bacon at home.Step 1
Mix the cure which should include the dry cure, sugar, smashed peppercorns, and squashed berries. Put the ingredients into a bowl.
Step 2
Add a couple of slashed laurel leaves into the blend. Forget about the scissors – use an herb grinder for a quick and easy process.
Step 3
Apply the cure mixture into the meat. Do not use all of the mixtures as you will still need them for the next steps. Rub just enough mixtures onto the meat, coating all sides.
Step 4
Put the meat inside a plastic food storage and store it in the base part of your refrigerator in a slant position for 24 hours. This allows the excess water to be easily drained out of the meat and of the container.
Step 5
The next morning, drain all the water from the container. For best results, drain the bacon joints using a colander. A collapsible colander would come in handy in this process as it can be adjusted to any size while draining the water away and drying the sustenance at the same time.
Step 6
When all water is drained, you’ll see that the color of the meat starts to darken. Apply more cure mixture into your pork joints. Again, use just enough blend, keeping some for another cure application.
Step 7
Store the meat again for 24 hours into the food storage with a slant position.
Step 8
Repeat the same steps on the third day.
Step 9
On the fourth day, take out the pork joint from the food storage and wash it with water to take off all the cure mixtures from it, especially its saltiness.
Step 10
Dry the meat using a kitchen towel or a paper towel and place it into a grill rack or a cooling plate. Then, store for another day into the base part of your fridge.
Step 11
On the fifth day, remove the meat from the cooler. Leave for at least 2 hours or so to come up at room temperature to prevent any moisture build-up into the surface of the meat which might hinder the absorption of the smoke flavor into the meat.
Step 12
Meanwhile, prepare your smoker. You may utilize a grill that has a cove for the cold smoking procedure if you do not have a smoker.
Step 13
Fill your smoke generator with oak chips or oak dust. Then, light the wood dust using a supplied tea light. Once the smoke starts to ascent from the wood, expel and stifle the tea light.
Step 14
Place your meat into your smoking rack, keeping each meat away from the other. Then, place your lit smoke generator onto the bottom part of your smoker and close the cover. Leave for around 12 hours. But make sure to check your meat from time to time.
Step 15
After smoking, expel the meat from your smoker and allow it to cool down for a few hours before serving. You may opt to store the bacon in the fridge in the event that you’re not gonna use it immediately. It would be best to vacuum pack the bacon before storing it in the fridge.
Smoking Tip:
You can make a smoking chamber from cardboard or an old kitchen cupboard.All you need is a flame broil rack region for your food, a metal plate or foil-lined base on which the cold smoke generator can sit.
Venting ought to incorporate a vent at the base which will draw the tenderly seething wood dust and a vent at the top for the smoke to escape and restore itself.


0 Comments